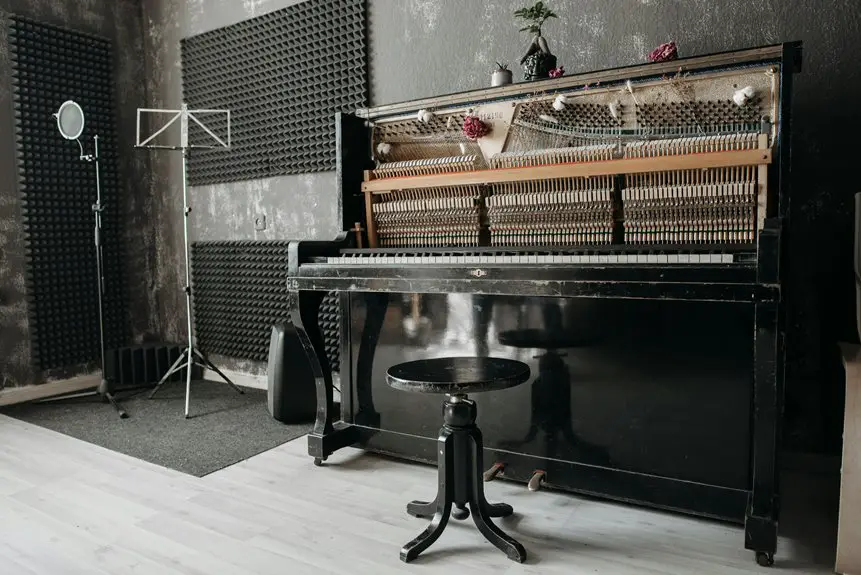
Check out YouTube for a variety of tutorials on building DIY acoustic panels. You’ll find step-by-step guides that cover everything from gathering materials like high-density foam to creatively styling the fabric. Many videos offer budget-friendly options and tips for effective placement in your space. Don’t forget to look out for design ideas that enhance the room’s aesthetics. If you’re curious about common pitfalls to avoid, there’s even more insightful information available.
Table of Contents
Key Takeaways
- Search for channels specializing in home improvement or soundproofing for focused DIY acoustic panel tutorials.
- Look for videos with clear step-by-step instructions and visual demonstrations to simplify the building process.
- Check for tutorials that discuss material options, including budget-friendly alternatives like recycled materials or heavy curtains.
- Consider videos that showcase creative designs to inspire aesthetic appeal while maintaining functionality.
- Verify the tutorial’s viewer ratings and comments for feedback on effectiveness and ease of following the instructions.
Essential Materials for DIY Acoustic Panels
To create effective DIY acoustic panels, you’ll need a few essential materials that guarantee sound absorption and aesthetic appeal.
Start with high-density foam or mineral wool, as these materials excel at absorbing sound waves. You’ll also want a sturdy frame, which can be made from wood or PVC, to support the panels.
Begin with high-density foam or mineral wool for superior sound absorption, and don’t forget a sturdy frame made of wood or PVC.
Don’t forget about the fabric; choose a breathable, decorative material that complements your space while allowing sound to pass through.
Adhesive spray or a staple gun will help secure the fabric to the frame. Finally, consider mounting hardware like brackets or hooks for easy installation.
With these materials in hand, you’re well on your way to crafting panels that enhance both your acoustics and your decor.
Step-by-Step Guide to Building Acoustic Panels
While building acoustic panels may seem intimidating, following a clear step-by-step guide can make the process straightforward and enjoyable. Start by gathering your materials and tools. Next, cut the insulation to your desired size.
- Frame the panel using wooden boards.
- Attach the insulation firmly within the frame.
- Cover the front with fabric, making sure it’s taut.
- Secure the fabric at the back with a staple gun.
Finally, mount your panels on the wall using brackets or adhesive strips. Don’t forget to measure the space where you plan to hang them to guarantee ideal placement.
Creative Designs for Aesthetic Appeal
After successfully constructing your acoustic panels, you might want to enhance their visual appeal. One way to do this is by choosing fabric covers that match your room’s color scheme.
Consider using bold patterns or textures to make a statement. You can also frame your panels with wood or metal for a more polished look.
Incorporating art or prints onto the panels can transform them into unique wall décor. You could even create a gallery wall by arranging multiple panels in various sizes and orientations.
Don’t forget about lighting; strategically placing lights can accentuate your panels’ design. With these creative ideas, your acoustic panels won’t just serve a functional purpose, but they’ll also elevate your space’s aesthetic charm.
Tips for Proper Placement and Installation
When you’re ready to install your DIY acoustic panels, placement is key to maximizing their effectiveness.
Consider ideal wall locations and follow height and spacing guidelines to guarantee optimal sound absorption. Getting these details right will greatly enhance your listening experience.
Ideal Wall Locations
Choosing the right wall locations for your DIY acoustic panels can greatly enhance sound quality in your space.
To maximize their effectiveness, consider these tips for placement:
- Identify sound reflection points: Locate areas where sound bounces, such as opposite walls.
- Focus on corners: Placing panels in corners helps reduce bass buildup.
- Avoid direct sunlight: Keep panels away from windows to prevent damage and fading.
- Target high-traffic areas: Install panels in spots where noise levels are typically higher.
- Assess room shape: Consider the layout; irregular shapes may require more strategic placement.
Height and Spacing Guidelines
Proper height and spacing are essential for maximizing the effectiveness of your acoustic panels. To achieve the best sound absorption, place panels at ear level when sitting, typically around 36 to 48 inches from the floor. Verify there’s a few inches of space between each panel to avoid creating sound waves that can cancel each other out.
Here’s a quick reference table for your installation:
| Height (inches) | Spacing (inches) |
|---|---|
| 36 | 2 |
| 42 | 4 |
| 48 | 2 |
| 54 | 6 |
| 60 | 4 |
Budget-Friendly Alternatives for Acoustic Treatment
If you’re looking to treat your space acoustically without breaking the bank, consider using recycled materials.
You can also explore DIY soundproofing techniques that are both effective and affordable.
Let’s uncover some creative options that won’t strain your wallet!
Recycled Materials Use
When it comes to creating effective acoustic panels on a budget, using recycled materials can save you money while being environmentally friendly.
There are plenty of items around your home that can serve as excellent sound-absorbing materials.
Here’s a quick list of what you can use:
- Old blankets or comforters
- Used cotton or wool clothes
- Egg cartons or foam packaging
- Cardboard boxes or old wooden pallets
- Fabric remnants from previous projects
DIY Soundproofing Techniques
While it might seem challenging to tackle soundproofing on a budget, there are plenty of effective DIY techniques that can help you achieve a quieter space without breaking the bank.
Start by using heavy curtains or blankets on windows and walls; they absorb sound waves effectively. You can also create acoustic panels from inexpensive materials like cardboard and foam, which you’ll find in many YouTube tutorials.
Consider adding weather stripping around doors and windows to minimize noise leaks. Rugs and carpets can dampen sound as well, so don’t overlook your flooring.
Finally, furniture placement matters—arranging bookshelves and sofas strategically can help block and absorb sound.
With these budget-friendly tips, you’ll enjoy a more peaceful environment in no time!
Common Mistakes to Avoid When Building Panels
As you commence on building your DIY acoustic panels, it’s crucial to steer clear of common pitfalls that can undermine your efforts.
Here are mistakes you should avoid:
Avoid these common mistakes when building your DIY acoustic panels to ensure optimal sound absorption and aesthetic appeal.
- Choosing the wrong materials: Not all fabrics or insulation types are effective for sound absorption.
- Neglecting measurements: Always measure your space accurately to guarantee a proper fit.
- Ignoring panel placement: Position panels strategically for maximum sound absorption; don’t just slap them on the wall.
- Skipping testing: Test your panels after installation to see if they effectively reduce noise.
- Overlooking aesthetics: Don’t forget to take into account how the panels will blend with your room’s decor.
Frequently Asked Questions
How Long Does It Take to Build Acoustic Panels?
Building acoustic panels can feel like crafting a symphony; it usually takes you about a few hours to gather materials and assemble them. With patience and precision, you’ll create harmony in your space.
Can I Use Recycled Materials for Acoustic Panels?
Yes, you can use recycled materials for acoustic panels! Old blankets, cardboard, or even unused furniture can effectively absorb sound. Just guarantee they’re dense enough to achieve the desired acoustic performance in your space.
Do I Need Special Tools for This Project?
Think of building acoustic panels like assembling a puzzle. You won’t need fancy tools—just a few basics like a saw and a staple gun. With those, you’re set to create something awesome without breaking the bank!
How Do I Maintain My Acoustic Panels Over Time?
To maintain your acoustic panels, regularly check for dust and debris. Gently vacuum them or use a damp cloth for cleaning. Avoid direct sunlight to prevent fading, and guarantee proper airflow to prevent moisture buildup.
Can Acoustic Panels Improve Vocal Recording Quality?
Studies show that proper acoustic treatment can improve vocal recording clarity by up to 70%. If you install acoustic panels, you’ll notice a significant reduction in unwanted reverberation, leading to cleaner, more professional-sounding recordings.


