
To build a custom desk organizer from scratch, start by choosing materials like wood for durability or acrylic for a modern touch. Design your layout based on your essentials and space constraints, then measure and cut your materials accurately. Assemble the parts, ensuring everything fits securely. Don't forget to add personal touches, like colors and textures that match your style. With a bit of creativity, you can enhance your workspace considerably, and there's more to explore on this process.
Key Takeaways
- Identify essential items and design a layout that maximizes space and accessibility for effective organization.
- Choose materials that match your aesthetic and functional needs, such as wood, acrylic, or metal.
- Measure and mark accurately before cutting materials to ensure precision and avoid errors during assembly.
- Assemble the organizer by gluing panels together securely and allowing adequate time for the glue to cure.
- Personalize your organizer with colors, textures, and decorative elements that reflect your style and enhance your workspace.
Choosing the Right Materials for Your Desk Organizer

When you're ready to create your custom desk organizer, choosing the right materials is essential for both functionality and aesthetics.
Start by considering wood, as it's durable and offers a warm, classic look. If you prefer something lighter and more modern, opt for acrylic or plastic. These materials come in various colors and are easy to clean.
Consider wood for a classic look, or choose acrylic for a modern, colorful, and easy-to-clean alternative.
Don't forget about metal for an industrial touch; it's sturdy and stylish. For a unique twist, you might even mix materials, combining wood and metal for contrast.
Finally, think about finishes—natural, stained, or painted surfaces can affect both the look and feel of your organizer. Ultimately, select materials that reflect your style while meeting your organizational needs.
Designing Your Desk Organizer Layout
When designing your desk organizer layout, start by identifying the essential items you need to keep within reach.
Next, consider your space constraints to guarantee everything fits comfortably.
Finally, sketch some initial designs to visualize how it all comes together.
Identify Essential Items
To create an effective desk organizer layout, you must first identify the essential items you use daily.
Take a moment to assess what you reach for most often—pens, notebooks, sticky notes, or your phone. List these items to understand what you need close at hand.
Consider the tools that help you stay productive, like a stapler or paper clips. Don't forget about your tech accessories, such as chargers or USB drives, if they're part of your routine.
Prioritizing these essentials will guide your design, ensuring everything fits comfortably and conveniently.
Once you have this list, you'll be ready to create a personalized space that enhances your workflow and keeps distractions at bay.
Determine Space Constraints
Understanding your space is essential for designing an effective desk organizer layout. Start by evaluating your desk dimensions and identifying areas that can accommodate your organizer.
Consider factors like the height of your items and the depth of your desk. You want your organizer to fit seamlessly without overwhelming your workspace.
- Measure your desk's width, height, and depth.
- Identify the areas on your desk that are underutilized.
- Determine how much vertical space you can use.
- Keep access to frequently used items in mind.
- Visualize how your organizer will impact your workflow.
Sketch Initial Designs
After evaluating your desk's dimensions and available space, it's time to bring your ideas to life by sketching initial designs for your desk organizer.
Grab a pencil and paper, or use a digital tool if you prefer. Start by outlining the basic shape—consider whether you want a simple box or a multi-level design.
Think about the compartments you'll need: a section for pens, a space for sticky notes, and perhaps a drawer for miscellaneous items.
Don't hesitate to experiment with different layouts and sizes. Once you've got a few sketches, refine them by ensuring everything fits well together.
This step is essential, as it sets the foundation for your organizer's functionality and aesthetic appeal.
Happy sketching!
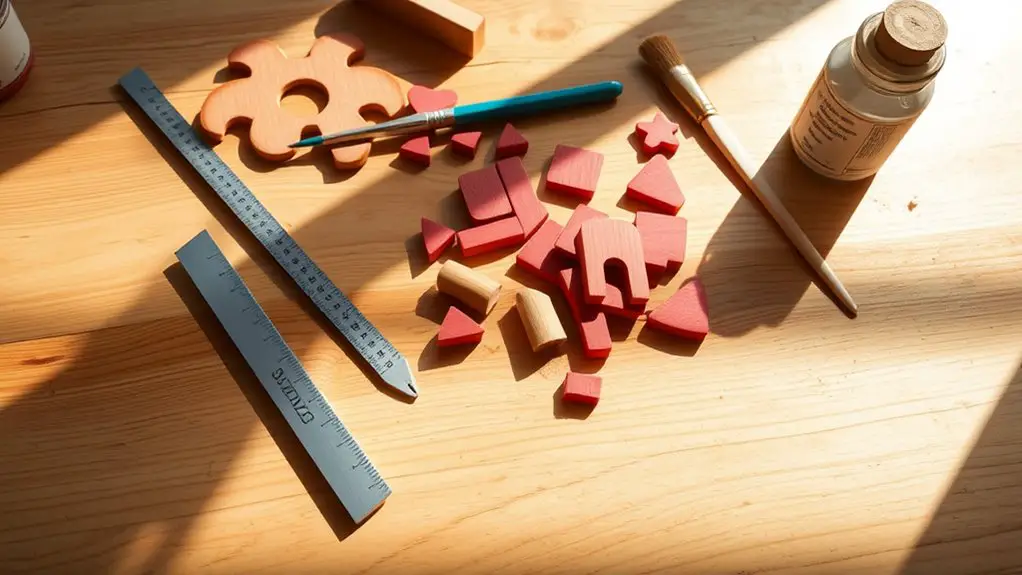
Measuring and Cutting Your Materials
Before diving into assembly, you'll want to confirm you've accurately measured and cut your materials for a polished final product. Accurate measurements confirm your desk organizer fits perfectly in your workspace.
Accurate measuring and cutting are essential for a polished desk organizer that fits seamlessly in your workspace.
Here are some key tips for this step:
- Use a reliable measuring tape to avoid errors.
- Mark your cuts clearly with a pencil for precision.
- Double-check your dimensions before cutting to prevent mistakes.
- Choose the right saw for the material; a miter saw works great for wood.
- Sand the edges after cutting to smooth out any rough spots.
With careful measuring and cutting, you'll set a solid foundation for your custom desk organizer.
This attention to detail pays off in the final look and functionality!
Assembling the Desk Organizer
Now that you've got your materials ready, it's time to assemble your desk organizer. Start by laying out the base piece on a flat surface.
Position the side panels at right angles to the base, ensuring they're flush against the edges. Use wood glue to secure them in place, applying clamps for stability while they dry.
Next, attach the back panel, aligning it carefully with the sides and base. Once that's secure, add any dividers you've planned for your organizer.
Make sure they're evenly spaced and firmly glued in place. Finally, double-check all connections for stability.
Allow ample time for the glue to cure before moving on to the next steps, ensuring your desk organizer is sturdy and ready for use.
Adding Personal Touches and Finishes
Now that you've assembled your desk organizer, it's time to make it truly yours.
Think about the colors and patterns that inspire you, and consider incorporating unique materials that reflect your style.
These personal touches won't only enhance its look but also make your workspace feel more inviting.
Choosing Colors and Patterns
As you begin your journey of personalizing your custom desk organizer, choosing the right colors and patterns can truly elevate its aesthetic appeal.
Think about how these elements reflect your personality and style. Here are some tips to help you decide:
- Match Your Workspace: Choose colors that complement your existing decor.
- Consider Your Mood: Bright colors can energize, while softer tones can create calm.
- Use Patterns Wisely: Stripes or polka dots can add fun, but keep it subtle.
- Experiment with Textures: Incorporate matte, glossy, or metallic finishes for depth.
- Think About Functionality: Darker colors can hide stains, while lighter shades show dust.
With these ideas, you're well on your way to creating a desk organizer that's uniquely yours!
Incorporating Unique Materials
Incorporating unique materials into your custom desk organizer not only adds a personal touch but also enhances its overall design. Think about using reclaimed wood, colorful fabric, or even metal accents. Each material brings its own character, making your organizer stand out.
For instance, a piece of driftwood can give a rustic vibe, while sleek acrylic can create a modern look. You might also consider adding decorative elements like washi tape or stencils for a splash of color.
Additionally, try mixing textures; combining smooth and rough surfaces can create visual interest. Don't shy away from experimenting—your desk organizer should reflect your personality and style, making your workspace not just functional but also inspiring.
Organizing Your Workspace Effectively

How can you transform a cluttered workspace into a haven of productivity? Start by evaluating what you truly need. Remove items that don't serve a purpose and keep only essentials.
Here are five key steps to organize effectively:
- Declutter regularly: Set aside time weekly to clear out unnecessary items.
- Categorize your tools: Group similar items together for easy access.
- Utilize vertical space: Use shelves or wall organizers to maximize available areas.
- Implement a filing system: Store documents in labeled folders to reduce paper clutter.
- Personalize wisely: Add a few personal touches, but avoid distractions that can derail your focus.
With these steps, you'll create a workspace that inspires productivity and creativity.
Tips for Maintaining Your Desk Organizer
To keep your desk organizer functioning effectively, it's important to establish a consistent maintenance routine.
Start by decluttering regularly; set aside a few minutes each week to remove unnecessary items. This prevents your organizer from becoming chaotic.
Make it a habit to return items to their designated spots after use, ensuring everything stays in order.
Additionally, periodically assess your organizer's layout—if something isn't working, don't hesitate to rearrange it.
Cleaning is vital too; wipe down surfaces to remove dust and debris.
Finally, consider seasonal reviews to adapt your organizer to changing needs.
Creative Ideas for Customization
Maintaining your desk organizer is just the beginning; personalizing it can really enhance your workspace. Customization not only reflects your style but also boosts your productivity.
Here are some creative ideas to make your desk organizer uniquely yours:
- Colorful Paint: Add a splash of your favorite colors for a vibrant look.
- Personalized Labels: Use fun fonts to label each compartment, making organization easier.
- Decorative Paper: Line the inside with patterned or textured paper for a stylish touch.
- Incorporate Plants: Add small succulents or air plants for a fresh, natural vibe.
- Photo Inserts: Include small framed photos or art pieces that inspire you.
Get creative and enjoy the process of making your desk organizer a true reflection of you!
Frequently Asked Questions
What Tools Do I Need to Build a Custom Desk Organizer?
To build a custom desk organizer, you'll need a saw, drill, screws, sandpaper, measuring tape, and a level. Having these tools on hand will make your project smoother and more enjoyable. Let's get started!
How Much Time Does It Take to Complete the Project?
It typically takes you about 2 to 5 hours to complete a project like this, depending on your skill level and the complexity of the design. Don't rush; enjoy the process and make adjustments as needed.
Can I Use Recycled Materials for My Desk Organizer?
Absolutely, you can use recycled materials for your desk organizer! Old cardboard, plastic containers, or wooden scraps can all be repurposed. It's a great way to save money and create something unique that fits your style.
What Are Common Mistakes to Avoid During Assembly?
During assembly, you'll want to avoid rushing and skipping measurements. Don't ignore the importance of proper alignment and securing joints. Finally, double-check your work to catch any mistakes before the final assembly.
How Can I Ensure My Organizer Fits My Desk Space?
To guarantee your organizer fits your desk space, measure the area accurately, consider any obstructions, and sketch a layout. Adjust dimensions accordingly, so it complements your workflow without overcrowding your workspace.