To create a dramatic Rembrandt lighting effect, position your key light at a 45-degree angle above your subject’s eye level. This setup should cast a distinct triangle of light on the shadowed cheek. Use softboxes to diffuse the light for a more flattering look, and adjust the distance to balance shadows and highlights. Experiment with your background for added depth. If you want to master this technique, there’s plenty more to learn about enhancing your portraits.
Key Takeaways
- Position your key light at a 45-degree angle above eye level to create the characteristic triangle of light on the opposite cheek.
- Use softboxes or diffusers to soften shadows and enhance the flattering quality of the light on your subject’s face.
- Adjust the distance between the light source and subject to balance intensity and shadow definition for dramatic effects.
- Choose a solid or textured background that complements the subject without distraction, enhancing the overall mood of the portrait.
- Experiment with contrast, vignettes, and color grading in post-processing to emphasize light and shadow, enhancing the dramatic impact of the image.
Understanding Rembrandt Lighting
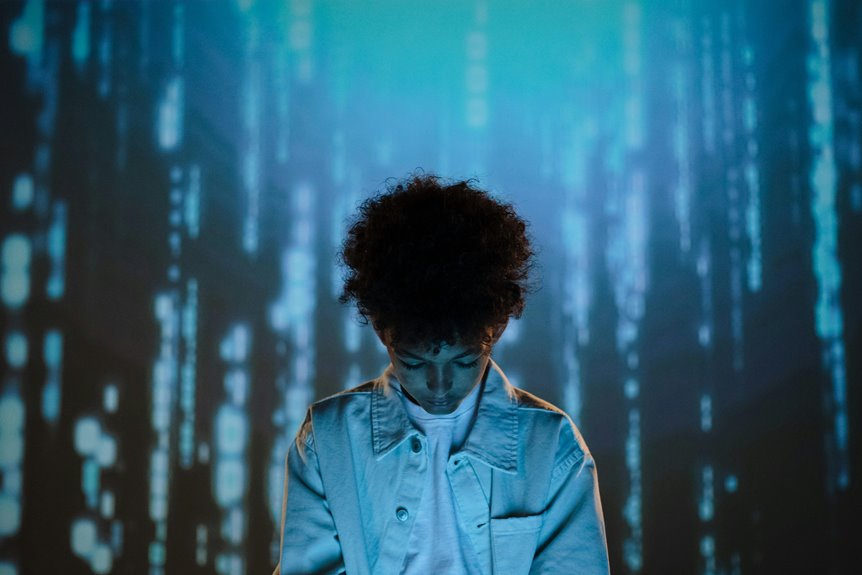
Rembrandt lighting is a classic technique that can transform your portraits into striking works of art. This style is characterized by a distinct triangle of light on the subject’s cheek opposite the light source, creating depth and drama.
To achieve this effect, position your light source at about a 45-degree angle to your subject’s face, slightly above eye level. The shadows will enhance facial features, adding interest and dimension.
Pay attention to the direction of the light and the subject’s angle; small adjustments can greatly impact the final outcome. Remember, it’s about finding the right balance between light and shadow, which ultimately captures the essence of your subject while evoking emotion in your audience.
Setting Up Your Shooting Space
To create the perfect Rembrandt lighting effect, you need to pay close attention to your lighting position and background.
Make sure your light source is at the right angle to capture that signature triangle of light on your subject’s cheek.
Additionally, choose a background that complements your subject without distracting from the overall composition.
Ideal Lighting Position
Achieving the enchanting allure of Rembrandt lighting hinges on the thoughtful positioning of your light source.
Start by placing your key light at about a 45-degree angle from your subject, both horizontally and vertically. This angle creates the characteristic triangle of light on one side of the face, which is essential for that dramatic effect.
Make certain the light is slightly above your subject’s eye level, directing it downward to enhance facial features.
You might want to use a softbox or diffuser to soften the shadows, making the lighting more flattering.
Experiment with the distance of the light to adjust the intensity and shadows.
Background Considerations
When setting up your shooting space, the background plays an essential role in complementing the Rembrandt lighting effect. A well-chosen background enhances the drama and depth of your portrait.
Here are some key considerations:
- Texture: Opt for backgrounds with interesting textures, like brick or fabric, to add depth.
- Color: Choose colors that contrast with your subject’s skin tone, ensuring they stand out.
- Clutter: Keep the background free of distractions; a simple background often works best.
- Distance: Position your subject away from the background to create separation and enhance the lighting effect.
Choosing the Right Light Source
When it comes to creating the Rembrandt lighting effect, choosing the right light source is essential.
You can opt for natural light or artificial light, each bringing its unique qualities to your setup.
Additionally, understanding light positioning techniques and using modifiers will help you achieve that classic look.
Natural vs. Artificial Light
Choosing the right light source can dramatically influence the Rembrandt lighting effect in your photography. Both natural and artificial light have their unique qualities, and understanding these differences can help you achieve the desired mood.
- Natural Light: Offers soft, diffused illumination, perfect for creating depth and texture.
- Golden Hour: The warm, low angle of the sun enhances shadows, making it ideal for dramatic effects.
- Artificial Light: Provides control over intensity and direction, allowing for precise adjustments.
- Modifiers: Using softboxes or reflectors with artificial light can mimic the softness of natural light.
Ultimately, your choice depends on the look you want to create.
Experimenting with both can lead to stunning results!
Light Positioning Techniques
Positioning your light source effectively is essential for achieving the Rembrandt lighting effect, as it directly impacts the play of shadows and highlights on your subject’s face.
Start by placing your light at a 45-degree angle to your subject, slightly above eye level. This angle creates that signature triangle of light on the cheek opposite the light source.
Experiment with distance; moving the light closer intensifies shadows while pulling it back softens them. If you’re using natural light, position your subject near a window, adjusting their angle for the best effect.
For artificial light, a softbox or a reflector can help control intensity and direction.
Light Modifiers Usage
Selecting the right light modifier can dramatically enhance your ability to create the Rembrandt lighting effect.
Each modifier shapes and softens light differently, influencing the mood and depth of your portraits. Here are some popular options to evaluate:
- Softbox: Provides diffused, even lighting, reducing harsh shadows and creating a gentle glow.
- Umbrella: Offers versatility; reflective umbrellas bounce light while shoot-through umbrellas soften it, ideal for various setups.
- Grid: Narrows the light beam, directing it precisely where you want, which enhances the dramatic shadows characteristic of Rembrandt lighting.
- Snoot: Focuses the light tightly, creating sharp highlights and shadows, perfect for emphasizing the subject’s features.
Experiment with these modifiers to find the combination that best suits your vision!
Positioning the Key Light
When you want to achieve the striking Rembrandt lighting effect, the placement of your key light plays an essential role.
Position your key light at about a 45-degree angle to your subject’s face and slightly above eye level. This setup casts a dramatic shadow across the face, creating that iconic triangle of light on the cheek opposite the light source.
Make sure the light is directed toward the subject’s face, but avoid harsh shadows that can detract from the effect. Experiment with the distance between the light and the subject to find the right balance of intensity.
A soft light can help enhance the mood, so consider using a diffuser if necessary to achieve that perfect look.
Creating the Characteristic Triangle
Once you’ve positioned your key light correctly, the next step is to focus on creating the characteristic triangle of light on your subject’s face.
This triangle, or Rembrandt triangle, adds depth and drama to your portrait. Here’s how you can achieve it:
- Adjust the Angle: Position the key light at about a 45-degree angle from your subject and slightly above eye level.
- Aim for the Shadow: Guarantee the shadow from the nose creates a triangle on the cheek, with the base of the triangle resting on the cheekbone.
- Monitor the Light: Check that the triangle is well-defined but not overly harsh.
- Fine-tune the Distance: Adjust the distance of the light to control its intensity and the size of the triangle.
With these steps, you’ll create that iconic Rembrandt lighting effect!
Balancing Shadows and Highlights
Achieving a dynamic portrait requires balancing shadows and highlights effectively. To create that signature Rembrandt look, you’ll want to emphasize the contrast between light and dark while ensuring the shadows don’t overwhelm your subject.
Position your key light at a 45-degree angle to your subject and adjust its intensity until you see those striking highlights on one side of the face, complemented by soft shadows on the other.
Pay attention to the shadow’s depth; too harsh can detract from the overall composition. Use a reflector or fill light to soften shadows if needed, bringing out detail without losing the dramatic effect.
Experimenting With Backgrounds
While the subject is essential to your portrait, the background can markedly enhance or detract from the overall effect. Experimenting with different backgrounds allows you to create the perfect atmosphere for your Rembrandt lighting.
Here are some ideas to contemplate:
- Solid Colors: Use a single-color backdrop to keep the focus on your subject and highlight the lighting contrasts.
- Textures: Incorporate textured backgrounds, like brick or fabric, to add depth without overwhelming the subject.
- Natural Settings: Shoot outdoors in locations with interesting features that can complement your lighting.
- Dark Backdrops: Utilize dark backgrounds to accentuate the dramatic shadows typical of Rembrandt lighting.
Post-Processing for Enhanced Effect
To truly enhance the Rembrandt lighting effect in your portraits, you can turn to post-processing techniques that refine your images further.
Start by adjusting the contrast to emphasize the play of light and shadow. Boost the highlights slightly to make those illuminated areas pop, while darkening the shadows for more depth.
Consider using a vignette to draw focus to your subject, enhancing their presence in the frame. You might also experiment with color grading, adding warmth to create a more dramatic atmosphere.
Finally, sharpness adjustments can help define facial features, making your subject stand out. Always remember to maintain a natural look; subtlety is key to preserving the integrity of your Rembrandt lighting effect.
Frequently Asked Questions
Can I Achieve Rembrandt Lighting With Natural Light?
Absolutely, you can harness the sun’s golden rays to cast shadows that dance across your subject’s face. Position them near a window or outdoors during golden hour, and you’ll evoke that classic Rembrandt style beautifully.
What Camera Settings Work Best for Rembrandt Lighting?
To capture Rembrandt lighting effectively, use a low ISO for better quality, a wide aperture to create depth, and adjust your shutter speed to balance the light. Experiment until you find the perfect combination.
How Do I Avoid Harsh Shadows in My Photos?
To soften those fierce shadows that threaten your photos, try bouncing light off a nearby wall or using a diffuser. You’ll create a gentle glow, allowing your subjects to emerge gracefully from the darkness.
Can I Use Multiple Light Sources for This Effect?
Yes, you can use multiple light sources to achieve this effect, but it’s essential to manage their intensity and direction. Experiment with different placements to create the desired shadows and highlights, enhancing your overall composition.
What Subjects Are Best Suited for Rembrandt Lighting?
Like a painter choosing the perfect canvas, you’ll find Rembrandt lighting suits subjects with strong facial features, such as portraits and dramatic profiles. It enhances depth and adds an enchanting, moody atmosphere to your images.