To test your lighting setup before a big presentation, start by evaluating the venue’s natural light and choose appropriate lighting equipment, like LED or softbox lights. Position your lights strategically, using a light meter to guarantee ideal intensity and angles. Conduct a dry run to check visibility and clarity, and don’t forget to seek feedback from peers to spot any issues. This will help create an engaging atmosphere for your audience. Keep exploring for more tips!
Key Takeaways
- Conduct a dry run to check visibility and clarity of visuals under the lighting setup.
- Use a light meter to measure Lux levels for key, fill, and back lights.
- Evaluate color temperature and its effect on skin tones to ensure true colors are represented.
- Seek feedback from peers during mock presentations to identify any lighting issues.
- Adjust lighting based on feedback and measurements for a balanced and inviting atmosphere.
Assessing the Venue’s Natural Lighting
When you step into the venue, take a moment to assess its natural lighting. Look around and notice how much daylight floods the space. Are there large windows letting in bright sunlight, or is the room dim and enclosed? This will impact how you present.
Check the direction of the light; it can create harsh shadows or highlight certain areas. If it’s too bright, you might need to adjust your positioning. Observe how the light changes throughout the day, especially if your presentation is scheduled later.
Consider using curtains or blinds to control the light if needed. By understanding the natural lighting, you can guarantee your audience clearly sees you, enhancing your overall presentation effectiveness.
Choosing the Right Lighting Equipment
While evaluating the venue’s lighting, you’ll want to choose the right lighting equipment to enhance your presentation. Different setups can dramatically influence the atmosphere and clarity of your content. Here’s a quick guide to help you decide:
| Type of Light | Best For | Considerations |
|---|---|---|
| LED Lights | Brightness and color | Energy-efficient |
| Softbox Lights | Soft, diffused light | Ideal for close-ups |
| Spotlights | Highlighting details | Can create harsh shadows |
| Flood Lights | General illumination | Covers large areas |
| Ring Lights | Even lighting on faces | Great for video calls |
Choosing the right equipment guarantees your message shines through clearly and effectively.
Setting Up Your Lights: Key Considerations
After selecting the right lighting equipment, it’s time to focus on how to set up those lights effectively.
Start by identifying your key areas: where you’ll stand, the audience’s view, and any focal points you want to highlight. Position your main light source at a 45-degree angle to avoid harsh shadows on your face.
Use fill lights to soften shadows and create an inviting atmosphere. Remember to adjust the height of your lights; they should be above eye level for the best results.
Finally, test different intensities and angles to see how they affect your presentation space. Make sure to account for any reflective surfaces that could alter your lighting setup.
A little preparation goes a long way!
Using a Light Meter for Accurate Measurements
A light meter can be an invaluable tool for achieving precise lighting in your presentation space. By measuring the intensity of light, you’ll know if your setup hits the mark for clarity and focus. Here’s a simple guide to help you understand light meter readings:
| Measurement Type | Ideal Range (Lux) |
|---|---|
| Key Light | 300-600 |
| Fill Light | 150-300 |
| Back Light | 100-200 |
Using these measurements, adjust your lights accordingly to create a balanced and professional look. Remember, accurate readings can help eliminate harsh shadows or overly bright spots, ensuring your audience stays engaged throughout your presentation. Don’t skip this essential step!
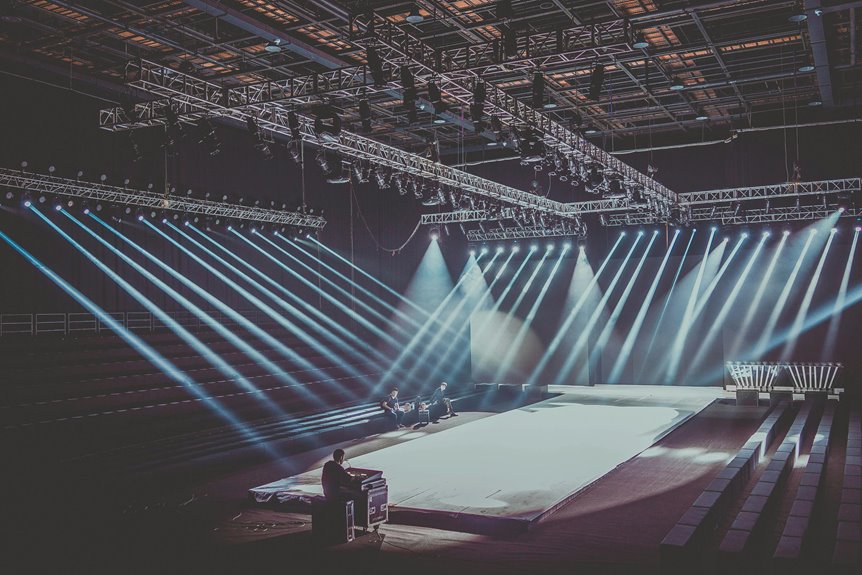
Testing Different Angles and Positions
Testing different angles and positions for your lighting setup can greatly enhance the overall quality of your presentation.
Start by placing your lights at various heights and distances from the subject. Move them from side to side, adjusting the angle to see how it impacts the lighting effect. Pay attention to how the light interacts with your backdrop and the subject’s features.
You might find that a 45-degree angle creates pleasing highlights, while straight-on lighting might wash out details. Don’t forget to experiment with multiple light sources—mixing soft and hard lights can add depth.
As you test each configuration, take notes on what works best, so you can replicate the ideal setup on presentation day.
Adjusting for Shadows and Glare
Finding the right angles and positions for your lighting setup is just the beginning; adjusting for shadows and glare is equally important.
You’ll want to walk around the space and observe how the light interacts with your environment. Pay attention to any harsh shadows on your face or body, as these can distract your audience. Adjust your lights’ intensity or angle to soften those shadows.
If glare from reflective surfaces is an issue, try diffusing the light or moving the source further away. You might also want to reposition furniture or props to minimize glare.
Don’t forget to test your setup multiple times; it’ll help you guarantee everything looks polished and professional for your big presentation.
Incorporating Backlighting for Depth
While you’re perfecting your lighting setup, incorporating backlighting can add depth and dimension to your presentation. By positioning lights behind you or your subject, you create a subtle glow that outlines your figure, enhancing visual interest. This technique helps separate you from the background, making you the focal point.
Experiment with different intensities to find the right balance; too much backlight may wash you out, while too little will be ineffective. Aim for a soft, diffused light to avoid harsh shadows.
As you test your setup, observe how the backlighting interacts with your main lights. Adjust accordingly to guarantee that the overall effect enhances your message, rather than distracts from it.
Evaluating Color Temperature and Tone
When you’re setting up your lighting, understanding color temperature is essential.
It can dramatically impact the mood of your presentation, so adjusting it to fit your theme is key.
Testing with samples will help you see how different tones interact with your environment and audience.
Color Temperature Basics
Color temperature plays an essential role in how your presentation is perceived, impacting both mood and visibility. It’s measured in Kelvin (K), with lower values (around 2700K) giving off a warm, cozy glow, while higher values (above 5000K) emit a cooler, more clinical light.
When you’re testing your lighting setup, consider the color temperature of your bulbs. Warmer tones can create an inviting atmosphere, while cooler tones might enhance clarity and focus.
You’ll want to match the color temperature with your presentation content and audience. Use a color temperature meter or smartphone app to evaluate your lighting.
Ensuring your lighting complements your visuals can make a significant difference in how your audience engages with your message.
Adjusting for Mood
To create the right atmosphere for your presentation, it’s crucial to adjust the lighting based on the mood you want to convey.
Warm color temperatures, such as soft whites or yellows, can evoke feelings of comfort and intimacy, making your audience feel more engaged. Conversely, cooler tones like daylight whites can create an energizing and professional environment, ideal for business presentations.
Consider the emotional response you want to elicit. If you’re aiming for inspiration, use warmer tones to create a welcoming space.
For a more formal, authoritative vibe, opt for cooler lights. Experiment with different intensities and colors to find the perfect balance that aligns with your message and enhances your overall presentation.
Testing With Samples
While you’re fine-tuning your lighting setup, testing with samples is essential to guarantee the desired color temperature and tone align with your presentation’s goals.
Start by selecting a few representative objects that reflect the colors you’ll showcase. Illuminate these samples under your current lighting to observe how they appear.
Take note of any color shifts; warm lights can enhance reds and yellows, while cool lights emphasize blues and greens. Adjust your lighting intensity and angle as needed, ensuring your samples maintain their true colors.
Don’t forget to check how skin tones look under different temperatures, as this can affect audience perception.
Conducting a Dry Run With Your Presentation
Before you step on stage, it’s essential to conduct a dry run with your presentation to guarantee everything flows smoothly. This practice helps you get comfortable with your material and identify any potential issues.
Conducting a dry run before your presentation ensures smooth delivery and boosts your confidence.
Focus on the following elements during your dry run:
- Lighting: Make sure your visuals are clear and the audience can see you well.
- Timing: Keep track of how long each section takes, so you stay within your allotted time.
- Transitions: Practice moving between slides or segments seamlessly to maintain engagement.
- Body Language: Work on your gestures and facial expressions to enhance your message.
Seeking Feedback From Peers or Colleagues
Getting feedback from your peers or colleagues can really enhance your lighting setup.
Schedule mock presentations to gather diverse perspectives, and don’t hesitate to use online collaboration tools for convenience.
Their insights can help you spot issues you might’ve missed and improve your overall presentation.
Gather Diverse Perspectives
How can you guarantee your lighting setup enhances your presentation? One effective way is to gather diverse perspectives from peers or colleagues. Their fresh eyes can spot issues you might overlook.
When you ask for feedback, consider focusing on these areas:
- Brightness Levels: Is the lighting too harsh or too dim?
- Shadows: Are there distracting shadows cast on you or your presentation materials?
- Color Temperature: Does the lighting create an inviting atmosphere, or is it too cold?
- Focus Areas: Is the audience clear on where to look during key moments?
Schedule Mock Presentations
Scheduling mock presentations is an essential step in refining your lighting setup and overall presentation. By inviting peers or colleagues to watch you present, you can gain valuable feedback on how your lighting enhances or detracts from your content.
Make certain to choose a time when everyone can focus without distractions. During these mock sessions, pay attention to how the lighting affects visibility and mood.
Ask your audience for specific feedback on bright spots or shadows that may hinder their experience. Encourage them to be candid, as constructive criticism will help you make necessary adjustments.
Afterward, take notes on their observations, and implement changes before your big presentation to guarantee a polished and professional delivery.
Utilize Online Collaboration Tools
Have you considered using online collaboration tools to gather feedback on your lighting setup? These platforms can help you connect with peers or colleagues who can provide valuable insights.
You can share your setup via video or photos, allowing them to see exactly what you’re working with. Here are some ways to effectively utilize these tools:
- Real-time feedback: Get instant reactions as you showcase your lighting.
- Diverse perspectives: Tap into different opinions to enhance your setup.
- Video conferencing: Conduct live sessions to make adjustments on the spot.
- Document sharing: Share images and notes to keep everyone on the same page.
Frequently Asked Questions
How Do I Choose the Right Color Temperature for My Presentation?
Choosing the right color temperature for your presentation involves considering your audience and environment. Aim for a warmer tone to create intimacy or a cooler tone for professionalism. Test both to see which suits your message best.
What Should I Do if My Lighting Setup Feels Too Harsh?
If your lighting feels like a blazing sun, soften it. Adjust the intensity, add diffusers, or shift angles. Balance shadows and highlights, so your space feels inviting, not overwhelming. Embrace warmth for a welcoming atmosphere.
Can I Use Smartphone Apps to Assess Lighting Conditions?
Yes, you can use smartphone apps to assess lighting conditions. These apps help you measure brightness and color temperature, giving you insights into how your space appears. It’s an easy way to enhance your setup effectively.
How Do I Avoid Flickering Lights During My Presentation?
To avoid flickering lights during your presentation, make certain you’re using compatible bulbs and check your power source. If possible, use a surge protector and test your setup beforehand to identify any potential issues.
What Accessories Can Enhance My Lighting Setup Effectively?
To enhance your lighting setup, consider adding diffusers for softer light, adjustable stands for flexibility, colored gels for mood, and reflectors to bounce light. These accessories’ll greatly improve your presentation’s visual impact and professionalism.